Uncategorized

Final Fantasy XIV Money Making Guide

Money is always useful, so learning how to get as much FFXIV Gil as you can as quickly as possible will always be helpful. If you have sufficient Gil in Final Fantasy XIV, in that case, you can upgrade your equipment, give your character unique features, or obtain a stylish mount with the long-term objective of eventually purchasing a home.

Gil can be obtained in various ways, including by completing quests, selling goods (perhaps ones you manufactured yourself if you choose from the FFXIV crafting jobs or ones you found using the FFXIV gathering jobs), defeating enemies, finishing dungeons, and taking on various challenges.

Making Gil in Final Fantasy XIV: An Introduction

Final Fantasy XIV has three primary methods for earning enormous sums of Gils (25 million+).

Purchase contents (Sell Your Body)

Working for crafters and Gil purchasers is a perk you can obtain if you are a member of the fflogs elite with links to selling linkshells, discords, and other items. They’ll take the rare treasure for Gil while you defeat bosses for them.

Craft (The Honest Gillionaire)

The most reliable method of earning a lot of Gil in FFXIV. Offer the newest tools, food, and potions for sale, all with your mark on them. Crafters frequently make between 5 and 25 Million Gil per week, depending on how busy they are. Be cautious; joining the craftsman ranks entails the Market Board’s undercutting conflict.

Compared to crafting, almost every other means of earning Gil will involve a greater amount of grinding for relatively little reward. All Gil-making techniques, however, still depend on timing for best results. 

You can earn three to four times as much money in the first week following a significant update as you might at any other time.

FFXIV Crafting

Endgame farming

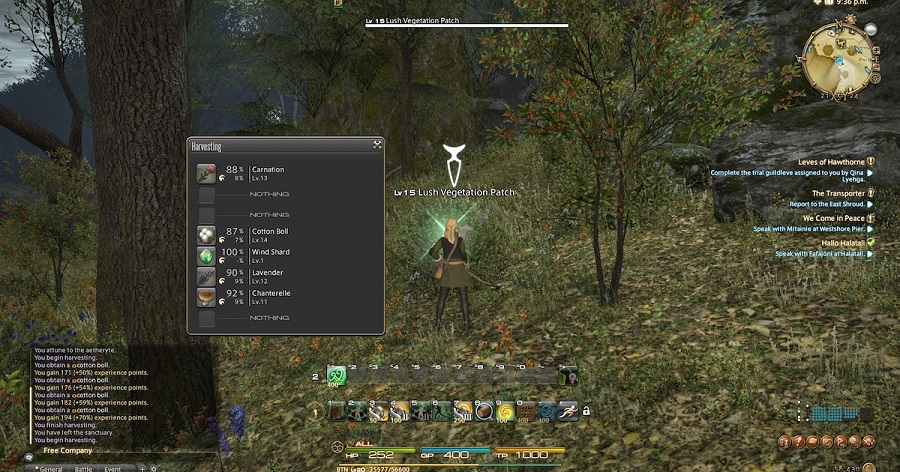
Many new avenues for earning money become available once you turn 50, even though they may not immediately be apparent. In the same manner, as previously mentioned, Disciples of War and Disciples of Magic can harvest foes. This is usually a consistent source of income because crafters constantly require new supplies. 

Every world has different things that are desired, but it is typically easy to determine what people need. You can find goods like fleece, diremite web, crystals, clusters, and others on enemies.

Making money isn’t limited to assassinating adversaries. When you complete dungeons like Ampador Keep, you receive Tomes of Philosophy. Although these are frequently used to purchase stuff for your character, they can also be used to purchase supplies for crafts.

Crafters are interested in these to manufacture high-end goods. Depending on your server once more, one of these can sell for up to $50,000. Making over 300,000 Gil after playing a few Dungeons for a few days is not the question!

Purchase Gil (Turn to The Dark Side)

For individuals who don’t care about the Terms of Service and prefer a low-key, simple lifestyle, it’s quick and straightforward. However, if you ever decide to go this way, we offer you a fantastic offer.

Visit our website MMOPixel to purchase buy Gil FFXIV. We provide the cheapest rate on the web.
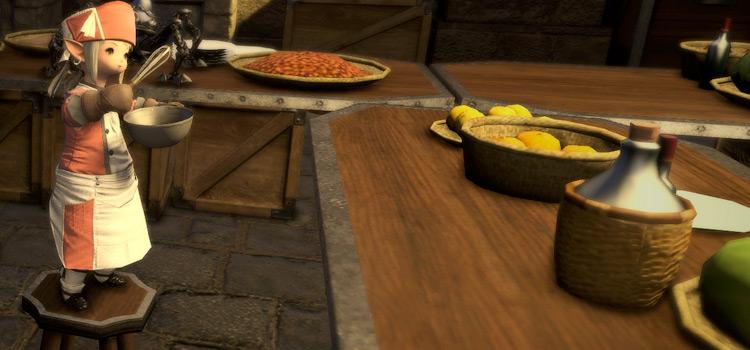
Craft and gather

Finding a job might be a good idea if you desire a consistent Gil revenue to (ultimately) become wealthy in FFXIV. Several options are available, including being a weaver, carpenter, chef, or botanist. The followers of the Hand, which make up most of these professions, specialize in item creation, but a few are more concerned with resource gathering (Disciples of the Land).

Due to the constant demand for commodities, gathering them is a simple way to make money (especially for Miners). These most basic supplies can sell on the Marketplace since crafters frequently prefer to buy supplies rather than seek them. The ability to sell or finish Treasure Maps will come later.

All crafters have their purposes, but armorers, goldsmiths, and alchemists produce the most valuable goods. Remember that when you level up these professions, you’ll be able to make better gear, ultimately selling for more Gil.

FFXIV Gathering

The FFXIV Retainer Ventures

Earning profit in Final Fantasy XIV is one of the nicest things since you can enlist the aid of your dependable retainers. You may take your Retainers on that so “Retainer Ventures” once you’ve finished the “Scions of the Seventh Dawn” Main Scenario Quest (level 17 required). You get expertise plus, of course, Gil by completing these missions.

Your rewards will improve as your Retainers complete more Ventures and their level rises. These Retainer Ventures are indeed a simple way to earn money that will eventually increase in value, despite not being the most profitable way to earn Gil in Final Fantasy XIV.

Keep in mind that you cannot begin a Retainer Venture until you have acquired a Venture currency. They are available for purchase from your Grand Company Vendor or obtained through completing Beast Tribe Quests and Guildleves.

Beast Tribe Challenges

In Final Fantasy XIV, the Beast Tribe Quests provide you some Gil, Tomestones, and Ventures as prizes, but that’s not the only benefit of completing them. You can access rare materials and items by completing tasks for the Beast Tribes, raising your reputation. 

These adornments, mounts, and minions are available from Beast Tribe Vendor; you can purchase them and offer them for sale to other players on the Market Board. Unique dyes should receive extra attention because they frequently command high costs. You just need to choose a handful of these ways to get money to start putting Gil in your wallet in Final Fantasy XIV!

FFXIV Tribe Challenges

Play Duty Roulette and the Weekly Challenges

Keep doing what you’re doing if you’ve completed the Duty Roulette and the Challenge Log to complete various tasks, such as gaining class experience (we have an FFXIV XP levelling guide if that may help). Although most of the techniques for earning Gil listed here are even more lucrative, these tasks provide a lot of in-game money and don’t need much effort.

Make sure you are the “adventurer in need” if you want to receive the most Gil from your Duty Roulette. Using a Tank or Healer will grant you a Gil bonus because these classes are frequently in low supply (as shown by the little indicator to the left of the level requirement in the Quest Finder). Remember to trade your Tomestones (an extra, high-level prize) for special equipment and accessories. You may earn more Gil by reselling them.

You can also use the Market Board to exchange loot with other players if you don’t need it (the FFXIV auction house). Desynthesizing will provide you with some materials for crafting. If you do this, you could keep a few of the components for your personal use and sell the others on the market.

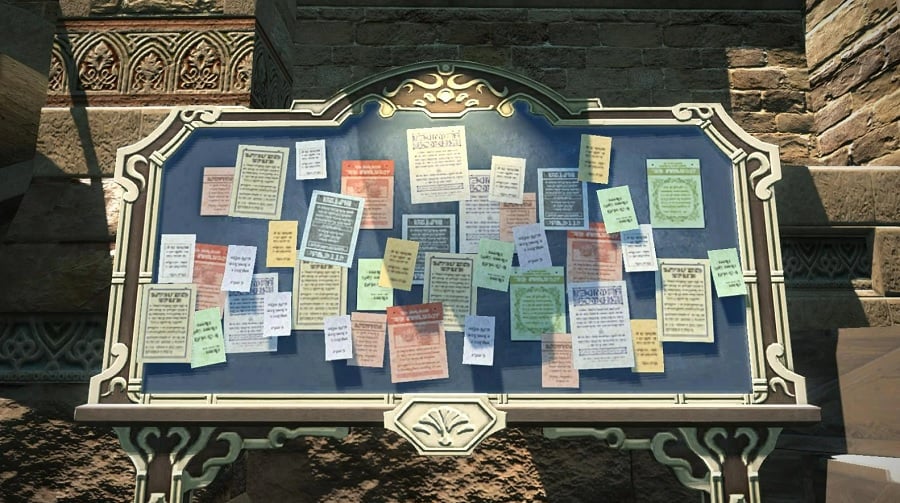
Read up on the Marketboard

What is the most lucrative thing to sell after levelling up your gatherers and craftspeople? Given that the demand may change occasionally, there is no ideal response to the question. Therefore, it is a good idea to always check the Market Board before choosing an item. 

As a general guideline, though, remember that most players are either looking for time-saving techniques or items they can’t produce themselves. They will provide good money for high-level equipment or a lot of basic materials.

To check how many others are selling the item you wish to sell and their asking prices, click on it. A larger stack would be appropriate if you sell food or basic supplies.

FFXIV Marketboard

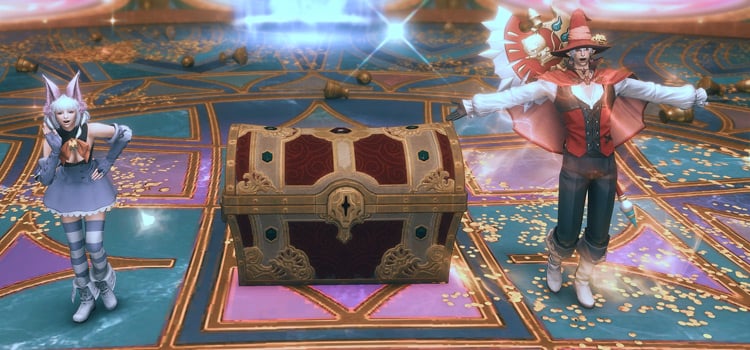
Maps of the Grand Company and Treasure Hunts

High-level Disciples of the Land (miners, fishermen, and botanists) can find FFXIV treasure maps when gathering. Additionally, you can purchase them at the market.

You can gain the capability to decode these maps and embark on a fruitful Treasure Hunt after finishing the “Treasures and Tribulations” quest (level 36). You may want to transfer the other Treasure Maps to a friendly player via mail so they may be stored because you can only retain one Treasure Map at a time.

Before you embark on a treasure hunt, keep in mind that using a treasure map is a bit of a gamble because you never know what you’ll find. You can offer the charts on the Market Board for a lesser but consistent amount of Gil, even if making them yourself is usually more lucrative in the long run.

Try the Grand Company Hunts rather than Treasure Hunts aren’t your thing. On the Hunt Board for your Grand Company, you can view available Hunts and their rewards. You can swap the Seals you earn for other valuable items and the quite large Gil prizes by completing them. To unlock the feature, you must advance to the level of Second Lieutenant.

FFXIV Treasure Hunts

Do Everything to Increase Profits!

Being self-reliant is the only surefire way to generate a tonne of Gil. Achieve high levels in a few complementary classes and sell the goods you can produce for a tidy profit. An attacking Class with Weaver and Miner is one of the greatest pairings. You may farm Banemintes as of level 50. After that, Diremite Webbing will be dropped. You can transform the web into Dew Yarn if you are a weaver with level 25 or higher.

Afterward, make Undyed Velveteen from the Dew Yarn by using it. Since you didn’t spend any money on supplies, if you sell the Velveteen, you’ll make a 100% profit. Miner will come in handy when you eventually run out of Lightning Shards. Pull the Miner out once it is tapped out, then hunt for Lightning Shards in and around Ul’dah. At level 1, this is feasible, but when you go to level 20, the shard yield doubles, making the strategy considerably more effective.

A player can cultivate, craft, and mine with all those three Classes without needing to buy anything from the Market Board. As your craft levels up, the likelihood of HQing will rise as well, earning you much more Gil each synthesis, and as your miner levels rise, you will farm shards more quickly, requiring less time to gather them.

Other Class combinations can also accomplish this feat, so carefully search the Market Board for products you may use to carry out the same action.

Source: https://www.mmopixel.com/news/final-fantasy-xiv-money-making-guide.html

ffxiv gil

Final Fantasy XIV Botanist Levelling Guide

Final Fantasy XIV or Final Fantasy XIV Online is a Massively Multiplayer Online Role-Playing Game (MMORPG). FFXIV offers various roles for its players to choose from. You will be doing activities based on your role, such as exploration, raids, fights, etc. Most people prefer action, so they find raiding dungeons and slaying monsters a fun activity to pass their time. But there are other activities where you can just sit back and relax. You can do these activities when you want to take a break from the action but still enjoy the game.

What is a better way to do this than strolling through the forests and collecting food and other natural resources. Final Fantasy’s Botany Class is the most suitable option for anyone looking to relax and do fun activities. This life skill is fun, especially for those seeking a vacation from saving the planet, as it involves everything from gliding from tree to tree to high-quality harvesting supplies. The following is a guide to help players advance from novice botanists to exceptional botanists. In this article, we will discuss the FFXIV Botanist Levelling Guide about how to get started to reach all the way to level 90.

Final Fantasy XIV Botanist

Getting Started – Reaching Level 20

In Final Fantasy XIV, if a player is looking to start their journey as a botanist, they must meet two requirements. The first requirement is that a player should at least rank level 10 in Disciple of Magic or Disciple of War. According to the second requirement, you must also have access to the city-state of Gridania. If you select the Archer, Lancer, or Conjurer job, this will be the case immediately. However, if your career places you in Ul’dah or Limsa Lominsa, it will take some time before you can travel to Gridania. In such a case, you ought to be well past level 10 when you reach Gridania.

Gamers must connect with the Botanist’s Guild receptionist in Gridania and get to know Fufueha, the guild’s leader, to begin their career as a botanist. The levequests for the trade skill will become available for acceptance following these events. You must focus on levels 1-20. They are easy to complete, and with the right resources, you will cover them in no time. In addition, you will get to collect various items during your quests. Here are the items you should be looking for.

  • For Levels 1 through 5 – The recommended gathering items are Mape Log and Earth/Wind/Water Shards, which can be found at Central Shroud and North Shroud, respectively. For levels 5 through 8 – the gathering item is Ash Log which can be found in both Central Shroud and North shroud.
  • For levels 8 through 20 – the Crow feather is the recommended gathering item. Crow Feather can be located at the Central Shroud.

You might wonder what to do with them since our guide advises gathering particular items to hasten the leveling process. Two methods are used. See whether you can utilize them in your recipes if you’re also leveling a crafting class. The elemental shards will probably be used, even if nothing else. Consider selling extra materials on the marketboard if you’re just going to stick to gathering for the time being. Although early-level transportation will only be worth a few Gil, it is still preferable to nothing. By the forties and fifties, you’ll find that there is more money to be made as you advance.

Also, here are the quests you will encounter as you progress from level 1 to 20:

Quest NameGathered Item(s)Quest Level
Way of the BotanistN/A1
My First Hatchet10x Latex1
Sap for Smiles10x Maple Sap5
Weapons of a Father10x Crow Feather10
Haste Makes Waste10x Marjoram15
Dressed to Harvest15x Grade One Carbonized Matter20

The Recommended gear sets for these quests are Amateur’s Double Set for levels 10 through 15 and Cotton Shepherd’s Gathering set for levels 15 through 22.

Final Fantasy XIV Botanist Guide

After the initial easy levels, you will require some starting Gil to fund your tools, food, materials, and other resources to progress further from here. You can fund your journey using the FFXIV Gil that you can get from our website. 

Visit our website MMOPixel to get FFXIV Gil. We only offer the best service.

Reaching Level 40

Since there will be a substantial jump in leveling at this point, players will gain from accepting levequests from important cities. Players are advised to accept the Carline Canopy NPCs since they will be in the city-state of Gridania for most of their gameplay. Botanists can also conduct leves in Eastern La Nocsea and the Costa del Sol. Accepting levequests before these levels are not advised.

  • For Levels 21 through 25 – The recommended gathering item is Yew Log which can be found at East Shroud.
  • For levels 25 through 32 – the gathering item is Gridanian Walnut which can be found in both South shroud.
  • For levels 32 through 37 – Oak Log is the recommended gathering item. It can be located at the South Shroud. 
  • For levels 37 through 40 – Mahogany Log is what you should be looking for in these levels. It can be found at Eastern La Noscea.

Also, here are the quests you will encounter as you progress from level 21 to 40.

Quest NameGathered Item(s)Quest Level
Aromatic Aspirations10x Marjoram25
What Nature Giveth15x Alligator Pear30
A Feast to Say the Least20x Laurel35
Crisis of Faith20x Ramhorn Zucchini40

The Recommended gear sets for these quests are the Velveteen Gown Set for levels 30 through 35 and the Cotton Doublet Vest of Gathering Set for levels 35 through 42. These gears can be located at Old Gridania.

Final Fantasy XIV Botanist Levelling Guide

Reaching Levels 41 to 60

When you reach this phase, you might wonder if it is the most tedious phase due to its slow progression. But looking at the positive side, you have learned a lot by the time you reach here. First, we should stress the importance of company-issued survival guides. Up until level 60, your Grand Company can assist you. At that point, you should resort to Revised Survival Manuals. These increase your experience gain for all gathering classes by 150 percent up to the top of their unique level range, which is quite impressive. Even after that, you can still use one for a 125 percent increase, so they’re not entirely useless. Finally, you probably have the Gatherers Scrips in your botany skills at this stage, so you can start saving for the nice stuff.

  • For Levels 45 through 50 – The recommended gathering item is Mirror Apple which can be located at the Coerthas Central Highlands.
  • For levels 50 through 60 – the gathering item is Rosewood Log which can be found in East Shroud.
  • For level 60 – There are 2 gathering items. These are Camphorwood Log and Bloodhemp. These items can be located at the Churnning Mists and the Fringes.

Also, here are the quests you will encounter as you progress from level 41 to 60.

Quest NameGathered Item(s)Quest Level
Botanist in a Bind20x Mistletoe45
Seeds of Hope3x Spruce Log50
Call from the CloudsN/A50
Onions of Life Bestowing10x Cyclops Onion53
Two Nations, One Seed10x Emerald Beans55
Love for Harmony10x Birch Log58
Seeds Know No Borders3x Chrysahl Greens60
Never Meet Your HeroesN/A60

The recommended Gear Sets for this phase are Boarskin Jarkin Set for levels 43-48. It can be found at Old Gridania. You can also find Raptors Jerkin Set at the same location to be used for levels 48 to 53. The other gear set is Botanist’s Set for levels 50 to 60. It can be found at Rowena’s Representatives.

Reaching Levels 61 to 80

As players have access to new features to aid in leveling up their botany career, the grind gets a little bit easier at this point. As players access higher-quality resources, the gathering also becomes more profitable. In addition, unlocking The Firmament will give gatherers a new area to gather. The Company-issued Survival Manuals should be replaced with the Revised Survival Manuals by level 60. Up until level 80, these items grant players a 150% experience point bonus. The impact is halved after reaching level 80. The Firmament and the boosts eliminate the need for gatherers to use any suggested gathering techniques. At level 70, crystarium will help you handle the quests. Also, here are the quests you will encounter as you progress from level 61 to 80.

Quest NameGathered Item(s)Quest Level
You Say Popoto, I Say…20x Wild Popoto & The Fringes (X: 11, Y: 25)63
Walking for Walker’s20x Walker’s Popoto & Ruby Sea (X: 7, Y: 8.5)65
The White Death20x Nanoriso & Ruby Sea (X: 13.5, Y: 16)68
Edgyth’s Winning Streak5x Rhalgr’s Streak & The Lochs (X: 5.7, Y: 8.7)70

The Recommended gear sets for these quests are the Serpentskin Gathering Set for levels 60 through 65, the Kudzu Set of Gathering for levels 48-53, and Landking’s Set for levels 70 through 80.

Levelling to 90

For levels 80 through 90, there is no specific guide as of now. By reaching level 80, you have learned everything essential you need as a botanist. Your aim should be to collect items now. These items will provide you with millions of EXPs. This might be time-consuming, but given the amount of EXPs, it’s worth collecting them. Players are free to do whatever they want once they achieve level 90. They can either resume killing enemies in dungeons or carry on making money from botany. They might also think of advancing to the top of the mining industry. This will be all from us for now. Stay Tuned with us for more updates.

ffxiv gil

Final Fantasy XIV Squadron Guide

Final Fantasy XIV or Final Fantasy XIV Online is a Massively Multiplayer Online Role-Playing Game (MMORPG). In the infamous series of Final Fantasy games, this is overall the 14th edition and just the 2nd MMORPG game after the Final Fantasy XI. After receiving heavy criticism upon the initial release, the FFXIV game was relaunched as Final Fantasy XIV: A Realm Reborn. The original game story was updated with new content and a different style. Although it’s been a while since FFXIV was released, some players still have difficulty understanding all the game’s features, especially if they are a beginner. 

One such feature you should be aware of is recruiting and commanding Squadron players. However, it’s more about adventure than anything else. In this article, we will be talking about the Adventurer Squadron. In our Final Fantasy XIV Squadron Guide, we will tell what exactly the Squadrons are and how you can unlock them. Unlocking Squadrons is one thing, and commanding them in battle is another. So, if you are a beginner, scroll down and read the complete article to learn more about the Squadron, which might prove to be your greatest allies in Final Fantasy XIV.

What are the Squadrons?

Players are allowed to command soldiers in their individual Grand Companies through Adventurer Squadrons. Players can send a squadron of soldiers on specialized missions after gathering a sufficient number of NPC recruits, collecting hefty prizes upon their return. They are considered one of the most resourceful options available in the game. They are extremely useful when you are a beginner or want to go solo. Due to its location behind Grand Companies, many new players are unaware of this game aspect. If you pay attention to squadrons, they can be a valuable source of useful consumables. If the Duty Finder intimidates or frustrates you, you can even employ squadrons to upgrade your combat tasks.

Final Fantasy XIV Squadron

Unlocking the Squadrons

You’ll have to rank as Second Lieutenant or a higher position in the Grand Company to unlock the Squadrons. The top rank in your Grand Company’s highest “tier” is a rather high rank. New players likely won’t be able to access the game until they have collected the requisite Company Seals and finished the relevant objectives.

It’s important to note that to complete this quest, you must first have the Challenge Log enabled. You can accomplish this by finishing the Level 15 quest “Rising to the Challenge.” You must use the Challenge Log as soon as they get access to it.

After unlocking the squadrons, you will witness some new parts available to you in the headquarters of your Grand Company. The option marked “Entrance to the Barracks” will now be available on one of the entrances. Accessing it sends you to the Grand Company Barracks, where you can oversee the personnel, recruits, instruction, and missions of your Squadron. You can simply enhance your outfits or the outfit of your team members with the help of the Glamour Dresser and Armoire in this area. Squadron members are subject to the standard glamour requirements. Therefore the clothes they wear must be of the right Level and class. To employ glamours, your recruit must be at least level 51. Also, keep in mind that the Squadron members can only advance to level 60 and are restricted to the base classes. 

Steps – in Short

  • Find and decide which Grand Company you’ll take. Reach level 15 in Main Story quests to choose your Grand Company. You can change it every 2 weeks or continue it as long as you want.
  • Achieve the rank of second lieutenant or higher in your Grand Company. To do this complete the Company’s Hunting Log and other quests. After you get the title, you will, depending on your Grand Company, get different quests, each with a certain level requirement. Let’s discuss them in detail.
  • If your Grand Company is ‘Order of the Twin Adder,’ You will get Twin Adder Squadron and Commander Missions. The quest is available at New Girdania with the Serpent Personnel Officer. The Level that you have to be at is Level 47 of the Disciples War or Magic.
  • Although, if you decide to have ‘Maelstorm’ as your grand Company, you will get Malstorm Squadron and Commander Missions. The quest is available with the Storm Personnel Officer at Limsa Lominsa Upper Decks. The Level that you have to be at is Level 47 of the Disciples War or Magic.
  • You can also choose ‘Immortal Flames’ as your Grand Company. In this case, you will have Immortal Flame Squadron and Commander Missions as the quests. The quest is available at Ul’dah – Steps of Nald with the Flame Personnel Officer. The Level that you have to be at is Level 47 of the Disciples War or Magic.
  • Once you have completed the quest associated with your Grand Company, you will progress to the Company Barracks.

Adding members to the Squad

To form a Squadron, you need to have at least three to four members in your Squadron. To unlock the squadron members, you must complete the Challenge Log quests. After you complete a mission in the challenge log, you unlock squadron members. This unlocking is just random, and gradually be able to get your hands on the Squadron Enlistment Manual. You will get it when you reach the Level of First Lieutenant. Obtaining the Squadron Enlistment Manual will increase your chances of recruiting squadron members.

Final Fantasy XIV - Adding Members to the Squad

You will get all enlistment paperwork at your desk in the squadron barracks. Select Question when looking at a prospective recruit’s enlistment papers to call them to the barracks and read their profile. You can then ask them to join your Squadron if you find them satisfactory. There is space for eight recruits in the barracks. To enlist recruits after reaching this cap, you must first discharge one of the Squadron’s current members. A potential recruit’s enlistment may also be delayed or terminated after you have reviewed their paperwork. Please be aware that if you delay enrollment, you will not be able to review the following application until you decide whether to accept or reject the current applicant.

Training and Missions to Level up the Squadron Unit

Leveling up the Squadron is important; you should know how to do it. You have three ways to do it, but to use all three ways, you should be at least at Level 2. Until you are not, there are two ways through which you can Level up the Squadron. One of the ways is through Training Missions. You can find these at the Regime Board.

You have assembled a group of soldiers, but what now? Now you have to train them, and the first step would be to train in the introductory City Patrol Mission. After you have completed this introductory training mission, you can find a new one on the Regime board. Each training session lasts one hour. All barrack recruiters will earn experience points once a training program is finished, and the Squadron’s general attributes will improve. Up to three training sessions can be completed by recruits each day. At 1:00 PM (PDT), training sessions are restarted daily.

Another way to help Level up your Squadron is through the Squadron Missions available at the Sergeant. The Squad is comprised of just four people for this task. It’ll only last for 18 hours. This squadron mission will lock once you finish it, and it won’t reopen until the next week’s reset. The required attributes option is included in this mission. You must choose squad members to fill the gaps left by their present attributes. This choice’s primary goal is to match it with the necessary attributes. You will receive a green signal if they are a match. If not, a red alert will appear. The squad members assigned to the squadron mission cannot be used for the command mission or the command training; it is vital to note.

Finally, the third option will be available to level 2 rank players. In this, you will encounter AI-controlled dungeons that you and your Squadron will have to take over.

Final Fantasy XIV Squadron Missions

Squadrons on Missions

Speak with the squadron sergeant to send your Squadron on a mission once they are well-prepared. Be aware that sending out your Squadron will cost you company seals, with fees rising as mission difficulty does. Since we are on the topic of leveling up and sending the troop on various missions, it is important to note that it requires initial funding. Beginner’s might find it difficult, and therefore we are here with a solution. To get your hands on these resources, you can use the FFXIV Gil that you can get from our website. 

Visit our website MMOPixel to buy FFXIV Gil for a reasonable rate. We only offer the best service.

Talking about the missions here, every mission has a level requirement that your squadron members must meet. The good news is that there is no fixed composition in which you need to send your Squadron. So hold off until your Squadron arrives. Missions must be finished in 18 hours (Earth time). By launching the Timers interface, which is under Duty in the main menu, you may see how much time is left on a task. Only one Priority task can be performed each week successfully. Timers will be reset at 1:00 AM (PDT) every week.

When your squadrons return, assess their mission and look at their performance to make sure what you need to work on. 

This will be all from us for now. Stay Tuned with us for more updates.

Source: https://www.mmopixel.com/news/final-fantasy-xiv-squadron-guide.html

ffxiv gil

Final Fantasy XIV Samurai Guide

Final Fantasy XIV features several job roles that are incredibly exhilarating and fun to play around with. Those already into the game know how popular the role of Melee DPS can be. Among the many other roles which can be encountered in the game, that of Samurai is surely gaining a lot of popularity among the players. Ever since its introduction in the Stormblood Expansion, the role of Samurai was an instant hit for newcomers and experienced players alike. 

Final Fantasy XIV’s Samurai role is a melee DPS role. Various melee DPS roles are available in the game, but this one is undoubtedly the most popular among the community members. Being a Samurai lets you use the Katana to make Kenki and Sen. You can later release various solid combo moves using these two. Like other jobs, Samurai also needs some basic requirements that you must pass. Although, Samurai roles do not have a base class.

If you are just a beginner, you might find this job a bit difficult, but once you get the hang of things, it will be an almost smooth sail. For all those who are looking to start with the Samurai role, we have prepared this article to help you. Read along to learn more about the samurai job types and how to use them. Let’s begin then.

Samurai Gameplay

Samurai role is a no-utility, high-damage melee task which provides a moderately lithe burst opening. They have a main stat of Strength and use the Katana. They also share their striking equipment with monks. Samurai doesn’t provide any raid perks or party benefits all over its own. As an alternative, it surpasses by taking advantage of the boosts given by the other party members, packing each burst opening with unrivaled power. 

Rotating between three fundamental combos to maintain two boosts and gain items, basically Kenki and Sen. This is all about the basis of the game’s Samurai role gameplay. First, Samurai release a powerful burst of tremendous attacks every 120 seconds, followed by a weaker burst at each interval of 60 seconds.

Moving or holding these burst openings is quite challenging because they necessitate a mostly GCD-based format. Therefore, a significant deal of Samurai’s development and the boost comes from altering your rotation in each fight. However, you can try this on a per-mechanic basis. Samurai job contains a low entrance barrier, but it requires a high ability ceiling to know how to change a character’s rotation differently to get around rules and keep benefiting from your team’s raid bonuses.

Final Fantasy XIV Samurai

Become a Samurai

Samurai role is not like other melee DPS jobs or any job seen in the Final Fantasy XIV game. By this, we mean, like other jobs available when you start the game, you won’t get the role of Samurai when you start with your character. Also, as we mentioned already, the Samurai role does not have a base class. So let’s now discuss the basic requirements to become a Samurai in the Final Fantasy XIV game. 

The very first requirement is Stormblood Expansion. A player must own it in order to become a Samurai. As you might have guessed, the second requirement is ranking on Level 50 in Disciple of War or Magic; once you attain these two requirements, head to Ul’dah for the next steps. 

Beginners might find attaining these requirements tedious and sometimes hard. In addition, they require resources to complete quests and travel. To get these, use Gils, which you can easily get from our website.

Visit our website MMOPixel to buy FFXIV Gil. We only offer the best service.

“The Way of the Samurai” Quest

As mentioned – own Stormblood expansion, reach level 50 in Disciple of War or Magic, and then go to Ul’dah. When you reach the Steps of Nald, you have to interact with the Ul’dahn Citizen, to begin with the quest known as The Way of the Samurai. When you complete this quest, your journey as a Samurai will begin. Become a samurai and keep leveling until you reach the current max level available in the Final Fantasy XIV game, level 90. There are ways to lessen the monotony and boredom associated with leveling up a new job, especially in endgame material.

Strengths of a Samurai

  • This is the 1st line
  • Low skill floor, high-skill ceiling.
  • Powerful 2-minute burst windows.
  • A large number of alternatives to spend your precious resources on.
  • Easy upkeep on self-buffs. 
  • High mobility in Hissatsu: Yaten and Hissatsu: Gyoten

Weaknesses of a Samurai

  • Damage-only party utility; job usefulness mainly reliant on player ability.
  • Burst windows require some planning, making it challenging to recover from deaths or extended downtime.
  • Having a wide range of unique talents comes at a cost that results in bloated hotbars.
Final Fantasy Samurai Guide

Let’s talk about Samurai Job Actions now.

Samurai Job Actions

Hakaze – a Level 1 action with a recast of 2.5s. This Weaponskill Type action delivers an awesome attack power of 200. It also provides a side effect in which Kenki Gauge is incremented by 5.

Jinpu – a Level 4 action with a recast of 2.5s. This Weaponskill Type action delivers an awesome attack power of 200. It also provides a combo bonus in which Kenki Gauge is incremented by 5. Fugutsu effects gained from the combo bonus can increase DMG dealt by 13%.

Third eye – a Level 6 action with a recast of 15s. This Ability Type action decreases DMG taken in the following attack by 10%. Other perk includes increased Kenki Gauge by 10 when hit.

Enpi – a Level 15 action with a recast of 2.5s. This Weaponskill Type action delivers a distance attack power of 100. It also provides a side effect in which Kenki Gauge is incremented by 10.

Shifu – a Level 18 action with a recast of 2.5s. This Weaponskill Type action delivers an awesome attack power of 200. It also provides a side effect in which Kenki Gauge is incremented by 5. Also causes Fuka effect, which reduces the weaponskill cast and recast time by 13%.

Fuga – a Level 26 action with a recast of 2.5s. This is a Weaponskill Type action that delivers a 90 attack with effectiveness to all of your enemies in a cone in front of you. Additional Impact: 5 Kenki Gauge Increase.

Gekko – a Level 30 action with a recast of 2.5s. This is a Weaponskill Type action that delivers an attack power of 120, and if an attack from behind the enemy, then 170. It also provides a side effect in which Kenki Gauge is incremented by 10.

Iaijutsu – a Level 30 action with a recast of 2.5s. This is a Weaponskill Type action which, based on the amount of Sen currently stored in the Sen Gauge, performs a weaponskill.

Magnetsu – a Level 35 action with a recast of 2.5s. This Weaponskill Type action delivers an attack power of 100 to all the opponents within reach. It also provides a side effect in which Kenki Gauge is incremented by 10.

Kasha – a Level 40 action with a recast of 2.5s. This Weaponskill Type action delivers an awesome attack power of 120. It also provides a side effect in which Kenki Gauge is incremented by 10 with additional benefits.

Oka – a Level 45 action with a recast of 2.5s. This Weaponskill Type action delivers an attack power of 100 to all the opponents within reach. It also provides a side effect in which Kenki Gauge is incremented by 10.

Yukikaze – a Level 50 action with a recast of 2.5s. This Weaponskill Type action delivers an awesome attack power of 120. It also provides a side effect in which Kenki Gauge is incremented by 15 with additional benefits.

Meikyo Shisui – a Level 50 action with a recast of 55s. This is an Ability Type action in which up to three weaponskill combos without first fulfilling the conditions for the combo. Does not impact Ogi Namikiri or Iaijutsu. The additional effect depends upon your attack. For example, if you managed to land Gekko, you get Fugetsu; else, if you managed to land Kasha, you get Fuka.

Hissatsu: Shinten – a Level 52 action with a recast of 1s. This is an Ability Type action that delivers an attack power of 250.

Hissatsu: Gyoten – a Level 54 action with a recast of 10s. This Ability Type action delivers an attack power of 100 by quickly getting close to the enemy. Although, this attack can’t be executed within bound.

Hissatsu: Yaten – a Level 56 action with a recast of 10s. This Ability Type action delivers an attack power of 100 by quickly getting close to the enemy. Although, this attack can’t be executed within bound.

Meditate – a Level 60 action with a recast of 60s. This is an Ability Type action that gradually increases your Kenki Gauge. It also cancels auto attack when executed. The Additional effect of this action includes getting Stacks of Meditation.

Hissatsu: Kyuten – a Level 62 action with a recast of 1s. This is an Ability Type action that delivers an attack power of 120.

Hagakure – a Level 68 action with a recast of 5s. This Ability Type action creates Kenki from Setsu, Getsu, and Ka. Your Kenki Gauge is increased by 10 for each Sen converted. Can only be carried out while at least one of the three statuses is in place.

Ikishoten – a Level 68 action with a recast of 120s. This is an Ability Type action that increases Kenki Gauge by 50. Additionally, makes Ogi Namikiri Fully prepared for 30 seconds. Although it can only be carried out during battle.

Hissatsu: Guren – a Level 70 action with a recast of 120s. This is an Ability Type action that delivers an attack with a potency of 500 to the first enemy and 25% less to all other enemies in a straight line in front of you. Senei and Hissatsu share a recast timer.

Hissatsu: Senei – a Level 72 action with a recast of 120s. This Ability Type action delivers an amazing attack power with 800 potency. Senei and Hissatsu share a recast timer.

Tsubame Gaeshi – a Level 76 action with a recast of 60s. This Ability Type action repeats the Iaijutsu that was just finished. It can only be used after Iaijutsu and only then. Additionally, upon execution, it starts the cooldown on weaponskills. It cannot be used, though, when weaponskills are on cooldown.

Shoha – a Level 80 action with a recast of 15s. This Ability Type action produces an attack with a 520 potency. It can only be used after using Iaijutsu, Meditate, or Ogi Namikiri to gain three stacks of Meditation while engaged in combat. After execution, the effects of Meditation diminish. It shares a timer for recasts with Shoha II.

Shoha II – a Level 82 action with a recast of 15s. This Ability Type action produces an attack with a 200 potency. It can only be used after using Iaijutsu, Meditate, or Ogi Namikiri to gain three stacks of Meditation while engaged in combat. After execution, the effects of Meditation diminish. It shares a timer for recasts with Shoha.

Fugo – a Level 86 action with a recast of 2.5s. This Ability Type action delivers an attack power of 100 to all the nearby opponents. It also provides a side effect in which Kenki Gauge is incremented by 10.

Ogi Namikiri – a Level 90 action with a recast of 2.5s. This Weaponskill Type action delivers a critical hit with a potency of 800 to the first opponent and 75% less to all other opponents in a zone in front of you. When under a critical hit rate-raising effect, the damage is boosted. It can grant a stack of Meditation up to 3 times. Though it can only be executed when under the effect of Ogi Namikiri Ready.

Kaeshi: Namikiri – a Level 90 action with a recast of 1s. This is an Ability Type action that delivers a critical hit with a potency of 800 to the first opponent and 75% less to all other opponents in a zone in front of you. When under a critical hit rate-raising effect, the damage is boosted. It also starts the cooldown of weaponskills when executed.

Apart from these Samurai Actions, various Role Actions and Samurai Traits can be used in the game for several powerful effects they can cause.

Final Fantasy Samurai Details

Role Actions are:

  • Second Wind – It helps to restore the player’s HP automatically.
  • Leg Sweep – Stuns the target.
  • Bloodbath – It converts physical DMG dealt to the enemy into your HP.
  • Feint – reduces the target’s ability to deal magic and physical damage by 5% and 10%, respectively.
  • Arm’s Length – makes a barrier that blocks most knockback and draw-in effects.
  • True North – voids all requirements for action direction.

Samurai Traits are:

  • Kenki Mastery – increases the Kenki gauge when certain weaponskills are executed or when damage is sustained when the Third Eye effect is active.
  • Kenki Mastery II – when landing all weaponskills excluding iaijutsu, Kenki Gauge is increased.
  • Way of the Samurai – raises the effectiveness of Shifu, Jinpu, and Hakaze to 200, 120, and 120, respectively.
  • Enhanced Iaijutsu – Iaijutsu spell time is shortened to 1.3 seconds.
  • Enhanced Fugetsu and Fuka – Improves Fuka’s decrease of weaponskill cast and recast time, spell cast and recast time, and auto-attack delay to 13%, while improving Fugetsu’s damage increase to 13%.
  • Way of the Samurai II – brings Gekko, Kasha, and Yukikaze’s potency up to 120.
  • Enhanced Tsubame-gaeshi – enables the Tsubame-gaeshi to accumulate charges for subsequent uses.
  • Fuga Mastery – transforms Fuga into Fuko.
  • Enhanced Meikyo Shisui – enables the Meikyo Shisui to accumulate charges for repeated uses.
  • Enhanced Ikishoten – Ogi Namikiri grants are ready upon Ikishoten execution.

You will get to know many other parts of Samurai Job when you start playing the game. In this article, we’ve tried to cover the basics of Final Fantasy XIV Samurai Guide. This will be all from us for now. Stay tuned with us for more updates.

Source: https://www.mmopixel.com/news/final-fantasy-xiv-samurai-guide.html

ffxiv gil

Final Fantasy XIV Ocean Fishing Bait Guide

In Final Fantasy XIV, ocean fishing is a popular pastime for many players. For example, let’s say you’re trying to level up a character using Fisher levels. In this scenario, it is also an excellent activity to level up significantly, making it appealing for many people or anyone looking to get some achievements. However, before you head out to sea, you must be certain that you have the right bait. The entire list of bait you’ll need to bring when ocean fishing in Final Fantasy XIV is covered in this guide.

It’s crucial to remember that your ship will stop in several different zones along the way, so you should make sure you talk to the NPC before boarding the fishing boat to find out where you’ll be traveling. As you move through the various routes, it helps to bring all the bait, but you can always buy more while on the boat. There are theoretically four pathways to choose from, each with three sites and a different type of fish.

Ocean fishing: What is it?

Diverting below the waves to force a spear through large shrimp and sharks is not the same as ocean fishing. That was from a previous expansion. Instead, it’s a quick trip on a specially constructed boat where 24 players collaborate to reel in various uncommon species.

It’s fine if you haven’t gotten used to fishing yet. The feature may be accessed and explored as soon as you pick up the class at the Fishing Guild in Limsa Lominsa. Of course, the chances are stacked against you at these lower levels for its hefty prizes, but Ocean Fishing is a terrific way to level up.

But you can’t just leave the boat and come back for another journey. In contrast to Palace of the Dead’s warfare courses, Ocean Fishing has a set schedule. So, if you’re seeking the quickest way to level 80 Fisher, you’ll have to level the traditional way between each of the boat’s two-hour round trips.

Final Fantasy XIV Ocean Fishing Details

Ocean fishing rewards

The benefits of ocean fishing can vary according to level. However, Ocean Fishing offers an absurdly high number of experience points, both with each capture and when the points are added up at the end, which are its main draw before reaching the level 80 ceiling.

Scrips, the final-stage currency of the three gathering classes, are given out by Ocean Fishing to individuals who have mastered their trade. The amount of Yellow Scrips you ultimately earn depends on how many points you score, but you can also get a few White Scrips by catching more elusive fish.

Beyond that, most players will initially focus on two distinct awards: the Hybodus mount and the Major General minion (more on both rewards below). Nevertheless, every fish you catch while ocean fishing can be framed and placed in your virtual home. Larger fish require larger frames, which can be purchased with the yellow scrips gained during each run by interacting with the dockside merchant.

Highly rewarding, isn’t it? The tasks might seem simple when you read about them. But, experiencing them in the game is a whole different thing. Rewards will come to those who are ready for this fishing adventure; by ready, we mean properly equipped and have enough resources to last the journey. Obtain these resources with FFXIV GIL, which you can get from our website in case you are falling short of them. 

If you want to get some Gil, you can visit our website MMOPixel to buy FFXIV Gil. We will provide you with the best service and lowest price on the web.

Get the Spectral Current going

You will have three opportunities to go fishing while the ship is at its three stops. There are numerous fish species, and each favors one of the three baits. Also included is a ghostly fish. A spectral current, which can only occur once every stop and has a short window for obtaining higher-value fish, may be created by catching the spectral fish. The spectral current is crucial for achieving good scores when ocean fishing; thus, triggering it is always our main objective. EveryoneEveryone on board should ideally use the spectral fish’s favorite bait until the present spawns.

Final Fantasy XIV Ocean Fishing Locations

Different stops have preferred bait for spectral fish:

  • • Sea of Bloodbrine — Krill
  • • Ragworm: The Ciedalaes
  • • Plump Worm at Galadion Bay
  • • Plump Worm in the Rhotano Sea
  • • Plump Worm in Rothlyt Sound
  • • Krill in southern Merlthor
  • • Ragworm in Northern Merlthor

 Fish Tug

The fish tugging on the bait is visible. When a fish bites, it corresponds to the exclamation points above your character. A mild tug is indicated by one exclamation mark, a strong tug by two, and a vicious tug by three. Finding out a fish’s tug strength allows us to identify the species of fish we are catching. Whether the fish is small, medium, or enormous, they all have a particular tug.

When the Spectral Current is present?

We select the bait that will allow us to profit the most from the spectral current once it is engaged, which is determined by various factors. We need a website called Lulu’s Tools, which includes a page dedicated to ocean fishing, to help us figure this out. On the top, we can see the upcoming voyages, which provide information on the route and any bonus goals. The information for the upcoming cruise is listed below it.

You can navigate between the many stations at the top to observe the fish offered there. Below, you can see every fish accessible outside the spectral current (above the line) and every fish accessible inside the spectral current (below the line), as well as the favorite bait for each fish.

Who Is Bite Time?

You can see the biting time next to the tug, which indicates how many seconds pass after casting before the fish bites. So, before we reel in a fish, we can nearly always tell what kind of fish it is by observing the tug strength and the bite time, which enables us to use our skills to increase the point total. 

Getting high scores in ocean fishing depends on knowing the fish on the hook and applying the proper techniques to maximize the points you obtain from that species.

When you use Cast, a timer only visible to you will start in your chat, telling you how much time has elapsed since you used Cast. To use a Cast macro, drag the button to replace Cast on your Hotbar. This will enable you to see the current bite time.

Skills and Combinations for Fishing

You may find out how many fish you can catch by casting a Double Hook or Triple Hook on a particular fish by looking at the Double Hook number on the ocean fishing website. If you use double or triple on some fish, they will produce various amounts. 

A decent place to start is with a Double Hook on the appropriate species, but you can advance to the holy grail of ocean fishing: Double Hook, Identical Cast, Price Catch, and Triple Hook.

If you don’t have the GP, another combination is available: Double Hook, Identical Cast, and Double Hook. In this situation, we are switching out the Triple Hook at the end for a Double Hook and forgoing Price Catch instead of simply trying to catch a big fish with our second Double Hook.

You can accumulate an Angler’s Art stack each time you land a huge fish (the maximum number of stacks is 10). Thaliak’s Favor can be used to recover 150 GP with three Angler’s Arts. 

We need them to make our huge combo work; thus, it is preferable to use Patients or Patient’s 2 with Precision and Strong Hookset skills to catch a few sizable fish at the beginning of the trip. A minimum of six stacks are required overall.

A debuff termed inefficient hooking will be applied for two minutes if you use Patients or Patients 2. Therefore, we need to utilize a Precision or Strong Hookset rather than the standard hookset to remove this debuff. For light tugs, use Precision Hookset; for powerful, savage tugs, use Strong Hookset.

To practice, you can use Lulu’s tools to view the available fish and choose a strategy. However, sometimes the right strategy and bait will work, but the right fish will not bite. Therefore, you must persevere in those situations.

While certain trips are better suited to attaining high scores than others, it is a good idea to accept whatever trip you can get while just getting started with ocean fishing rather than holding off and never receiving any practice.

Source: https://www.mmopixel.com/news/final-fantasy-xiv-ocean-fishing-bait-guide.html

Uncategorized

Final Fantasy XIV Culinarian Guide

Final Fantasy XIV, is a massively multiplayer online role-playing game (MMORPG) published and developed by Square Enix. The game takes place in a fictionalized world of Eorzea. Players are tasked to escape the apocalypse and then rebuild the Eorzea while dealing with other threats surrounding the land. 

This multiplayer fantasy game is available on various platforms, including – Microsoft Windows, PlayStation 3, PlayStation 4, OS X, and PlayStation 5. The original game was released in September 2010. 

Final Fantasy XIV has several guilds, most of which require fighting in the adventure land. But if you think it’s time you take a break from all the fighting and do something fun and non-fighting task, then Culinarian is the job you should go for. Cooking can be peaceful and fun at the same time. There are 90 levels, and reaching them won’t be that easy. But it’s not impossible, and when you reach the pinnacle, your Free Company associates will be lining up for the best foodstuff. Your treasury will be overflowing with personal sales.

Getting Started with Final Fantasy XIV Culinary

Culinarians rule the culinary world, preparing every known consumable in Eorzea. These great chefs, armed with a plethora of ingredients from throughout the realm and versed in ways from the remote reaches of Hydaelyn, assist adventurers in maintaining their strength on the battlefield.

Limsa Lominsa has the richest culinary legacy of any Eorzean city-state, owing to its proximity to fertile regions and copious waters and its position as the realm’s main trading port. A Culinarian will prepare rich, delicious cuisine for the adventurers to enjoy. In addition, Eorzea’s food feeds the stomach and improves stats and skills, making the Culinarian an indispensable community member.

Unlocking the Culinarian class is simple, as it is with most Disciple of the Hand classes. All you have to do is go to Limsa Lominsa’s Culinarian’s Guild. There is only one requirement: you must be a level 10 or higher Disciple of War or Disciple of Magic.

If you’re just starting in Limsa Lominsa, you can run into the guild before you can qualify for it. However, reaching level 10 in a fighting role does not take long. You only need a few hours to play the game at a typical, friendly pace. If you chose Ul’dah or Gridania, you’re unlikely to reach Limsa Lominsa before reaching job level ten, making the requirements appear non-existent.

Final Fantasy XIV Culinary

Reaching Level 20

You start at level one, and there is a plethora of tasks that will take you to the next levels in a quick time. But it might be hard to level up when you are a beginner, no matter how easy the quests are. So here, we will discuss the best quests you can complete to reach Level 20 and higher as soon as possible.

Quest NameQuest ItemLevel
My First SkilletMaple Syrup1
A Treat of TroutGrilled Trout5
Dodo It Yourself2x Grilled Dodo10
On a Skewer TipMeat Miq’abob15
Releasing a BurdenDried Plums20

These will be the first five quests you will encounter while training for the Culinarian Guild. Aside from guild objectives, you should make the most of the Culinarian’s Guild’s NPC supplier and your wanderings through the world. Reaching level 20 can be a breeze with a small investment in crucial elements that pay off handsomely. After all, each time you create a dish, you get experience!

Consider dressing appropriately for some key enhancements that will lessen your Culinarian workload. We concentrate on armor sets since merchants that offer them will also sell equivalent quality tools and accessories. There are plenty of different armor sets available to choose from. For these key enhancements, you can also use Gils, which you can get for real money.

If you want to get some Gil, you can visit our website MMOPixel to buy FFXIV Gil. We will provide you with the best service and lowest price on the web.

Don’t limit yourself when it comes to the armor. It will only help you level up faster. Again moving on to the next levels, let’s discuss how to reach level 40.

Reaching Level 40

Quest NameQuest ItemLevel
Winning Friends with AldgoatAldgoat Steak25
The Chefsbane ComethSmoked Raptor30
Of Cooks and BooksRatatouille35
Diplomacy of the SkilletBlood Currant Tart, Pastry Fish, Chamomile Tea40

 There are no restrictions in deciding which ones to perform, so you can choose which ones sound the simplest. In addition, Limsa Lominsa has a variety of leveling groups for Leves. For example, Quarrymill has level 20 leves, Quarrymill has level 25 leves, Costa del Sol has level 30 leves, the Observatorium (in Coerthas) has level 35 leves, and Whitebrim has level 40 leves (also in Coerthas).

Final Fantasy XIV Culinary Level Up

Reaching Level 60

Levels above 50 up to 55 are slow and boring. But you can get through them as soon as possible, so you won’t lose interest. Go all in on leves. Most of them are found in Foundation, which makes sense given that this is the moment the primary story switches focus to Ishgard. Grinding here will get you a few levels in a matter of hours, but combining it with Supply and Provision Missions will cut that time in half or more. Obtain a Company-issued Engineering Manual Two for a 150 percent increase at level 50. Here are some of the quests that you will encounter during the gameplay.

Quest NameQuest ItemLevel
A Taste of HomeDzemael Gratin45
Revenge of the ChefsbaneEft Steak, Beef Stew, Trapper’s Quiche, Crowned Pie50
Wait on MeN/A50
A Spoonful Less SugarIshgardian Tea, Sohm Al Tart53
Looking for Some Hot StuffBeet Soup, Kaiser Roll, Grilled Sweetfish55
Love Meat TenderCockatrice Meatballs58
The Spirit of HospitalityMorel Salad, Deep-fried Okeanis, Marron Glace60

These levels are not easy and shouldn’t be taken lightly. You might be a good culinarian, but you must surpass your current limit and do something better.

Reaching Level 80

You’ll need a modest stack of Commercial Engineering Manuals handy between levels 60 and 70. The Crystalline Mean plots, including Bethric’s, are very entertaining. Bethric is in charge of both Culinarians and Alchemists. There’s nothing particularly novel about how Stormblood presents itself in this sense, and as a bonus, Kugane’s gear seems to align with the duties ahead of you far better than Ishgard did. Crafting job quests in Shadowbringers were consolidated into five NPCs at the Crystarium, each of which shares various classes within their questlines. Here are the quests that you will be looking for.

Quest NameQuest ItemLevel
Rice to the OccasionDoman Rice Balls63
A Broth from the BrineDoman Udon Broth65
Teach a Man to Make FishNigiri-sushi68
The Way to a Father’s HeartDoman Sukiyaki70
The Crystalline MeanN/A70

Final Fantasy XIV Cooking

Reaching Level 90

As of writing this article, Studium Deliveries is the only path to reach the final level 90. It is the shortest and the only path you would take to complete your journey. Endwalker’s version of Shadowbringers’ crafting questlines follows the same rules exactly. You track down the corresponding NPC and cook up a storm for them, assisting them with their story shenanigans and earning a lot of respect.

Debroye in Old Sharlayan is your target. You must advance Endwalker’s main scenario quests a few levels before you can access her questline. Debroye, like Bethric, is the woman of the hour for Alchemists, so if you want to level multiple Disciples of the Hand, you’ll spend a lot of time with her. Apart from these things, you will also have weapons and other stuff that will assist you in reaching these levels.

Source: https://www.mmopixel.com/news/final-fantasy-xiv-culinarian-guide.html

Uncategorized

Final Fantasy XIV Ocean Fishing Bait Guide

In Final Fantasy XIV, ocean fishing is a popular pastime for many players. For example, let’s say you’re trying to level up a character using Fisher levels. In this scenario, it is also an excellent activity to level up significantly, making it appealing for many people or anyone looking to get some achievements. However, before you head out to sea, you must be certain that you have the right bait. The entire list of bait you’ll need to bring when ocean fishing in Final Fantasy XIV is covered in this guide.

It’s crucial to remember that your ship will stop in several different zones along the way, so you should make sure you talk to the NPC before boarding the fishing boat to find out where you’ll be traveling. As you move through the various routes, it helps to bring all the bait, but you can always buy more while on the boat. There are theoretically four pathways to choose from, each with three sites and a different type of fish.

Ocean fishing: What is it?

Diverting below the waves to force a spear through large shrimp and sharks is not the same as ocean fishing. That was from a previous expansion. Instead, it’s a quick trip on a specially constructed boat where 24 players collaborate to reel in various uncommon species.

It’s fine if you haven’t gotten used to fishing yet. The feature may be accessed and explored as soon as you pick up the class at the Fishing Guild in Limsa Lominsa. Of course, the chances are stacked against you at these lower levels for its hefty prizes, but Ocean Fishing is a terrific way to level up.

But you can’t just leave the boat and come back for another journey. In contrast to Palace of the Dead’s warfare courses, Ocean Fishing has a set schedule. So, if you’re seeking the quickest way to level 80 Fisher, you’ll have to level the traditional way between each of the boat’s two-hour round trips.

Final Fantasy XIV Ocean Fishing Details

Ocean fishing rewards

The benefits of ocean fishing can vary according to level. However, Ocean Fishing offers an absurdly high number of experience points, both with each capture and when the points are added up at the end, which are its main draw before reaching the level 80 ceiling.

Scrips, the final-stage currency of the three gathering classes, are given out by Ocean Fishing to individuals who have mastered their trade. The amount of Yellow Scrips you ultimately earn depends on how many points you score, but you can also get a few White Scrips by catching more elusive fish.

Beyond that, most players will initially focus on two distinct awards: the Hybodus mount and the Major General minion (more on both rewards below). Nevertheless, every fish you catch while ocean fishing can be framed and placed in your virtual home. Larger fish require larger frames, which can be purchased with the yellow scrips gained during each run by interacting with the dockside merchant.

Highly rewarding, isn’t it? The tasks might seem simple when you read about them. But, experiencing them in the game is a whole different thing. Rewards will come to those who are ready for this fishing adventure; by ready, we mean properly equipped and have enough resources to last the journey. Obtain these resources with FFXIV GIL, which you can get from our website in case you are falling short of them. 

If you want to get some Gil, you can visit our website MMOPixel to buy FFXIV Gil. We will provide you with the best service and lowest price on the web.

Get the Spectral Current going

You will have three opportunities to go fishing while the ship is at its three stops. There are numerous fish species, and each favors one of the three baits. Also included is a ghostly fish. A spectral current, which can only occur once every stop and has a short window for obtaining higher-value fish, may be created by catching the spectral fish. The spectral current is crucial for achieving good scores when ocean fishing; thus, triggering it is always our main objective. EveryoneEveryone on board should ideally use the spectral fish’s favorite bait until the present spawns.

Final Fantasy XIV Ocean Fishing Locations

Different stops have preferred bait for spectral fish:

  • • Sea of Bloodbrine — Krill
  • • Ragworm: The Ciedalaes
  • • Plump Worm at Galadion Bay
  • • Plump Worm in the Rhotano Sea
  • • Plump Worm in Rothlyt Sound
  • • Krill in southern Merlthor
  • • Ragworm in Northern Merlthor

 Fish Tug

The fish tugging on the bait is visible. When a fish bites, it corresponds to the exclamation points above your character. A mild tug is indicated by one exclamation mark, a strong tug by two, and a vicious tug by three. Finding out a fish’s tug strength allows us to identify the species of fish we are catching. Whether the fish is small, medium, or enormous, they all have a particular tug.

When the Spectral Current is present?

We select the bait that will allow us to profit the most from the spectral current once it is engaged, which is determined by various factors. We need a website called Lulu’s Tools, which includes a page dedicated to ocean fishing, to help us figure this out. On the top, we can see the upcoming voyages, which provide information on the route and any bonus goals. The information for the upcoming cruise is listed below it.

You can navigate between the many stations at the top to observe the fish offered there. Below, you can see every fish accessible outside the spectral current (above the line) and every fish accessible inside the spectral current (below the line), as well as the favorite bait for each fish.

Who Is Bite Time?

You can see the biting time next to the tug, which indicates how many seconds pass after casting before the fish bites. So, before we reel in a fish, we can nearly always tell what kind of fish it is by observing the tug strength and the bite time, which enables us to use our skills to increase the point total. 

Getting high scores in ocean fishing depends on knowing the fish on the hook and applying the proper techniques to maximize the points you obtain from that species.

When you use Cast, a timer only visible to you will start in your chat, telling you how much time has elapsed since you used Cast. To use a Cast macro, drag the button to replace Cast on your Hotbar. This will enable you to see the current bite time.

Skills and Combinations for Fishing

You may find out how many fish you can catch by casting a Double Hook or Triple Hook on a particular fish by looking at the Double Hook number on the ocean fishing website. If you use double or triple on some fish, they will produce various amounts. 

A decent place to start is with a Double Hook on the appropriate species, but you can advance to the holy grail of ocean fishing: Double Hook, Identical Cast, Price Catch, and Triple Hook.

If you don’t have the GP, another combination is available: Double Hook, Identical Cast, and Double Hook. In this situation, we are switching out the Triple Hook at the end for a Double Hook and forgoing Price Catch instead of simply trying to catch a big fish with our second Double Hook.

You can accumulate an Angler’s Art stack each time you land a huge fish (the maximum number of stacks is 10). Thaliak’s Favor can be used to recover 150 GP with three Angler’s Arts. 

We need them to make our huge combo work; thus, it is preferable to use Patients or Patient’s 2 with Precision and Strong Hookset skills to catch a few sizable fish at the beginning of the trip. A minimum of six stacks are required overall.

A debuff termed inefficient hooking will be applied for two minutes if you use Patients or Patients 2. Therefore, we need to utilize a Precision or Strong Hookset rather than the standard hookset to remove this debuff. For light tugs, use Precision Hookset; for powerful, savage tugs, use Strong Hookset.

To practice, you can use Lulu’s tools to view the available fish and choose a strategy. However, sometimes the right strategy and bait will work, but the right fish will not bite. Therefore, you must persevere in those situations.

While certain trips are better suited to attaining high scores than others, it is a good idea to accept whatever trip you can get while just getting started with ocean fishing rather than holding off and never receiving any practice.

https://www.mmopixel.com/news/final-fantasy-xiv-ocean-fishing-bait-guide.html

star citizen auec

Star Citizen – Ship Components Guide

The sections of a ship used to perform its functions, and the hull are collectively called components. Each component, from guns to thrusters, differs from other components in its class in various ways. Hardpoint Guys, which sells weapons from Apocalypse Arms or shield generators from Seal Corporation, is one place where equipment and components can be purchased. Other places include stores and shops spread out across the universe. 

After being integrated into your ship’s power and CPU systems, these components are fastened to it and turned on. Pilots may fine-tune, overclock, and test alterations to the components in addition to merely purchasing and connecting new equipment at their own risk of harm or devastation.

Star Citizen - Ship Components

Components use the “Size” system; only Size 2 hardpoints will accommodate and function effectively with Size 2 components. The only exception is the size of weapons, which have a more complicated system that allows them to be twin-linked, gimbaled, or manned with a compensating size increase. For example, a twin-linked and gimballed Size 3 weapon would need a Size 5 hardpoint. Although it may be simple to write off most parts as being less attractive than the flashier weaponry, turrets, and missiles, they are just as crucial to the overall performance of your spaceship. Therefore, they are far more frequently found throughout all ships and vehicles in the game.

Types of Components

Computers with avionics radars (formerly known as avionics motherboards or modules)

Fuel tanks for the thrusters’ hydrogen fuel are used for propulsion.

The Quantum Drive

Ships can travel across immense lengths of open space in a fair amount of time, thanks to the Quantum Drive engine type, which is based on manipulating the quantum medium.

Jump drive

Quantum fuel tanks for jump drives are tanks that store the fuel for the quantum drives.

Fuel pods

In order to supply additional hydrogen or quantum fuel for longer-range flights.

Thrusters

A spaceship’s thrusters are a crucial component, both for moving you around and for managing fuel usage and pollution. The smallest fixed maneuvering thrusters on a Nox, the enormous rotating VTOL thrusters found on the Idris, all the way up to the enormous fixed main thrusters found on the Bengal are just a few examples of the wide variety of sizes and types of thrusters. 

Star Citizen Thruster

Pristine Thrusters

The ship’s main thrusters, or main “M” thrusters, are what propel a ship forward. On traditionally built ships, these thrusters are crucial because they generate the majority of forwarding momentum.

Retro “R”

As a crucial thruster set aboard the ship, these have been transferred from the maneuvering part of the previous matrix and are now counted in the Main Thruster category. Having the largest thruster available is useless if you can’t stop in time. Because they are typically found in pairs, some ships may have more or fewer depending on their roles. Having damage can make stopping difficult.

VTOL “V”

These thrusters offer a lift in the Z+ axis and can either be set in place to deliver constant upward thrust or swivel to deliver that thrust as needed. If cargo or ships must enter or leave planets or moons with gravity, they frequently include fixed VTOL rockets on the underbelly to help them leave the atmosphere and halt their descent. Of course, it’s not the end of the world if a spacecraft doesn’t have specialized VTOL thrusters; it merely calls for greater planning in the previously listed situations.

Thruster Maneuvers

A fixed “F”

Since fixed maneuvering thrusters don’t need to align to the target vector initially, they can produce thrust instantly, increasing agility. The drawback is that you need more of them – at least 12 – to give your spacecraft 6DOF movement in all directions.

Goblet “G”

Thrusters used for gimbal maneuvering produce thrust on one or more axes while pivoting or rotating to position themselves along the required vector. As a result, fewer thrusters are required, but they must respond more slowly and use less power to get into position, which leaves them susceptible to power management issues.

Systems

Power Plants

The ship’s primary energy source is the power plant. However, its power varies according to its size, model, and type of technology.

Coolers

On every ship in the Star Citizen universe, coolers are an essential piece of gear. They prevent the Quantum Drives from overheating when used over longer distances.

Star Citizen Cooler

Extremely high temperatures are generated when quantum drives are activated. As a result, longer Quantum Drive engagement times are needed for farther destinations. For medium and long-term Quantum travel, the typical equipment Coolers that come with most Ships don’t have enough cooling capacity, which leads to overheating.

Generators of shields

Batteries

The majority of ships will contain batteries. These perform like real-world batteries and may be recharged and used for redundancy and lower signature performance while the power plant is offline.

Weapons

Ship Weapons

Fixed mounts or gimbal weapon mounts can be used to secure pilot-controlled weaponry to the ship.

Weapon mounting gimbals

You can utilize a Gimbal Mount as an option to add the largest weapon possible to your itemport. Conversely, players can use gimbals to attach a smaller-sized weapon, making it easier to line up shots than with a fixed weapon alone.

Turrets

From beginning to capital ships, there are turrets of all sizes, and the mounts they are attached to come in a wide range of sizes. The largest seen on some capital ships are as enormous as the smaller spacecraft flying escort, and they are armed with armaments capable of wreaking havoc.

Manned and Remote turrets are now separated into two separate groups. Both of these turret types can be controlled by players, NPCs, or AI using a variety of techniques described below:

Only turret hardpoints can accommodate turret attachments; weapons cannot accommodate turrets.

Turrets feature several itempoints that can be used to mount weapons. Although some turrets can also contain ordnance and utility hardpoints, these are typically weapon hardpoints.

All turrets are “hull locked,” and they can only be exchanged for other turrets of the same class. This means that you can only exchange a Manned Constellation Turret for another model of the same weapon.

One cannot be exchanged for, say, a Manned Starfarer Turret.

Due to hull limitations, Remote Turrets cannot be switched for Manned Turrets, and vice versa.

Turrets are no longer assigned a size because they are now “hull locked.”

Star Citizen Turrents

Personable Turrets (Manned)

A player or NPC acting as a player controls these turrets from inside of them, typically from a seat that moves from the ship’s hull into the turret itself.

All manned turrets have the same entrance tube diameter, making them plausible breach points after being destroyed.

Remote turrets

A player or NPC acting as a player controls these turrets from a station or seat elsewhere in the ship. They can control the turret and observe what it sees while physically being elsewhere in the ship, thanks to a remote vision broadcast back from the turret.

Remote turrets are a wonderful way to boost defense on ships where space is at a premium but frequently pack smaller guns because there is no physical passage for players to enter.

Missile

Missile Racks

Similar to a gimbal mount, missile racks are mounted to ordnance hardpoints first, then the missiles or torpedoes attach to them. These missile racks come in sizes comparable to those of weapons, and there are several missile rack alternatives for each hardpoint size with payload changes. 

Rocket Pods

We want to allow players to connect more things to these hardpoints as development progresses; the first is Rocket Pods, which launch unguided missiles similar to those previously available on the Mustang Delta. Rockets will have a range of fuse types, including proximity, impact, and time. Rockets should be ideal for ground attack missions where you wish to cover a region in explosives.

Star Citizen Missiles

Mines

Explosives can be dropped to protect a space, air, land, or sea location.

Utility Products

A Stor-All box on the Hornet F7C, for example.

Generators of Distortion Fields

Smaller variations of the components give a weapon like the Avenger Warlock its punch.

Size Grouping

All of these things, except Fuel Tanks and Utility Hardpoints, can be swapped, and to maintain balance, they are divided into one of five size categories:

Vehicle (0)

Capital (1) 

Small (2) 

Medium (2) 

Large (4)

You cannot place a Power Plant on a hardpoint that a Cooler occupies or replace two Small Shield Generators with a Medium Shield Generator since each itemport is limited to a single kind and size. The output difference between each class of items varies. Still, it can generally be said to have a 3:1 ratio, meaning that three Small items produce about the same output as one Medium item.

Sub–Components are contained within larger components and, in many ways, increase the base effectiveness. They are consumable components that deteriorate considerably more quickly than their host goods. Without sub-items, the base item continues to operate normally, but when sub-items are installed, performance is slightly improved. Players are advised to bring extras along for longer journeys because they may need to be changed. Base functioning is not hampered by the lack of spare parts (or the inability to carry spare parts) but rather by the ongoing maintenance cycle required to deliver an enhanced and highly competent system.

Each Sub Item falls into one of three categories, each of which boasts a unique set of stats for that item:

Efficiency: Enhances the overall efficacy of the primary item by lowering power consumption or enhancing cooling capabilities.

By absorbing various forms of damage or lowering wear rate and misfire possibilities, protection lowers the damage being dealt to the primary item.

Detection – Prevents emissions from the primary object in different spectrums or offers scanning resistance.

Sub Goods, like a Power Plant Sub Item, is not limited to a certain sort of item and can fit in various types of items.

Blades for computers are not sub-items. Instead of enhancing a base stat, they are standalone items that add or expand functionality. While they can now only be applied to computer-related items, there may be more uses for them in the future.

Ships play a very crucial role in the gameplay of Star Citizen. As you proceed in the game, it becomes tough to survive with the ships you already own since the inception of the game. At that time, getting new ships also becomes hectic, so in such a situation, the best way is to use Star Citizen Credits (UEC) to get new ships. 

If you need them, you can click on our website MMOPixel to buy Star Citizen Auec. We will provide you with the best service.

Source: https://www.mmopixel.com/news/star-citizen-ship-components-guide.html

eso gold

The Elder Scrolls Online Fast Levelling Up Guide

Greetings and welcome to the ESO Power Levelling Guide (Elder Scrolls Online). Your experience gains will be accelerated as much as possible with the help of this leveling guide. If you effectively level up in The Elder Scrolls Online, it’s not a grind! This will allow you to level up quickly or earn more Champion Points as quickly as feasible.

Well, the effective and normal way to gain EXP in ESO is by “GRINDING,” but it can get exhausting occasionally, so I don’t suggest doing this the entire day. If you are fresh out of the box, you’ll need to first enjoy reprieves for questing, investigation, gathering, crafting, etc., to encounter the whole game.

Choose a place that’s not too busy, has quick opponent respawn periods, and has a lot of adversaries that can be readily drawn towards you to make enemy grinding even more effective. Since they won’t stop mid-pull from casting spells or shooting arrows at you, melee foes like bears, spiders, or zombies tend to be the best for this reason. However, any enemy is great if you can locate tons of them in one location.

A similar XP increase is available in PVP battlegrounds; you don’t even need to win the encounter to receive it! You can obtain the same random prize additional experience if your team finishes at least in second place. Keep trying if you don’t understand it the first time.

How to boost your leveling EXP?

If you are in party 2 you will get a bonus EXP. You also get a 10% bonus experience if you have ESO Plus. You can also buy craft or can craft yourself training gear that will increase EXP gained from kills by a certain percentage based on the quality of the items. If you have white, blue, purple, or yellow, it’s going to increase the higher that you go, and you can get a good bit of combined bonus exp from having your item or armor sets and weapons. 

The next thing you can do is add exp scrolls from the crown store or the daily rewards. These will give you 50, 100, or 150 EXP. 

The other experience booster is potions like “Psijic Ambrosia,” “Awtherial Ambrosia,” & “Mythic Aetherial Ambrosia,” and these go in price. Unfortunately, the higher it goes, the more EXP we get, so they are quite pricey, and you can make up a decent amount by brewing them as well. 

The last thing you can use for exp boosting is the Ring of Mara; and you can marry someone in the game, and it will give you bonus EXP when you are adventuring both with the couple.

The Elder Scrolls Online Levelling Up

Methods

Method 1

If you are looking for a consistent and low entry barrier with no DLCs or expansion, then the method you will do is DOLMEN or start with Dolman. Yes, many players don’t like this, but it’s a good way to level up, and you can access them at level 3 as soon as you come to the game. And the place to do this is Alik’s Desert; these have the closest triangle of dolmens (you can teleport in shrines near the Dolmen).

If you are unfamiliar with Dolmens, they are the Deadric anchors that, as part of the main ESO plot, have invaded Tamriel. In the standard game, each zone has three Dolmen spawn locations. Each Dolmen spawns with wave after wave of Deadra opponents, giving you and your teammates lots of experience as you defeat each wave. A final monster appears after all the waves have finished, and when you fight it, the Dolmen is cleared, and you gain bonus experience. In other words, you are gaining experience on top of the experience. Finally, if it’s feasible, attempt to finish all three of the Dolmens in the zone by teleporting close to each one when it respawns while sprinting between wayshrines.

Method 2

This method is for those who want to craft and do not mind shoveling a lot of money but get insane EXP pretty quickly. This is a very simple method and is easier to do on PC. This is by doing Master and holiday Writs. Master writs are which you can do when you have the crafting profession maxed at level 50, and it grants you an insane amount of EXP Potential. 

Master Writs are written particularly for masters and call for specialized skill sets or crafting techniques that not everyone can access. Master Writs are more frequent if you put a lot of effort into them. They are only given to players who complete the toughest normal crafting Writs.

You can also get Writs by buying them from Guild Trades in exchange for Gold. If you are falling short of sufficient Gold to get the Writs, you can easily buy this from our website.

If you need them, you can click on our website MMOPixel to buy ESO Gold. We provide the best service.

Method 3

This method is extremely fast, but there are parameters. First of all, it is free in its base game. It is in Craglorn; it is called Skyreach Catacomb near Skyreach Wayshrine (if you are below 50, you will not be able to do it. You will need someone to carry you. If you have friends, then do it for free. If not, some people sell Skyreach runs for a certain amount of Gold per run approximately 5-10K). If you have a lot of EXP bonuses and the person carrying you is real, you can get 1 to 50 in a few hours; it is kind of insane. The main pro of this method is that it is instanced with no competition. Another method that is probably better is called Black Rose Prison, which is in MURKMIRE; it will require a DLC and ESO plus.

The Elder Scrolls Online Levelling Up Methods

Method 4

Dungeons & Battlegrounds

These are very consistent but are a little slower. Again, it will be better if you are in a group, giving you a lot of EXP and skill points. Visit Rimmen Necropolis and do your grinding because enemies span very quickly and cool down takes no time. 

Method 5

Visit Zombie farm in Alik’s desert, northeast of Sentinel. Make the zombie follow you in a pack and then nuke the pack, and you will gain tons of EXP. 

Leveling up tips:

  • Full set of Training GearEXP scrolls 
  • Leveling with one person
  • ESO plus

Lastly, I want to share my personal opinion. While trying to engage in this futile endeavor, the leveling up, hungry players erroneously believe that the leveling process is where you gain most of your experience and performance ability. On the contrary, the character you are developing will certainly benefit from learning the fundamentals and accumulating the skill points. This character development occurs between 1 and 50 levels because there is no fast cut in learning.

Source: https://www.mmopixel.com/news/the-elder-scrolls-online-fast-levelling-up-guide.html

Uncategorized

Final Fantasy XIV: Endwalker – Secret In The Box Guide

The fourth and most recent Final Fantasy XIV expansion, Endwalker, completes the story arc of Eorzea’s struggle with Garlemald. Traveling to new locales like Old Sharlayan and Radz-at-Han will allow players to experience a variety of new dungeons and challenges. Here are the answers to the FFXIV Endwalker Secret in the Box puzzles.

Final Fantasy XIV: Endwalker - Secret In The Box

Start of the quest and pre preps

You can begin the quest if you have completed the necessary conditions. First, go to Old Sharlayan and warp to The Aetheryte Plaza to do this. Once there, proceed to these coordinates (X:10.6, Y:11.1). A woman sitting on a seat and a gleaming breast will be visible.

Following your conversation with the woman, she will give you a note that details how to unlock the lockbox on the bench. The three phases, however, are all cryptic puzzles, so there is a catch. The good news is that you don’t have to go very far because each puzzle can be solved in Old Sharlayan.

You must fulfill a few prerequisites before you can access the “Secret in the Box” quest. First, you will need to complete a large section of the Endwalker MSQ, which can take some time, even if it’s not crazy. Complete Disciples of War or Magic at Level 80 “Outside Help” (MSQ).

Final Fantasy XIV: Endwalker - Secret In The Box Quest

Solutions to the riddles – Secret in the Box

There are plenty of brand-new side missions to complete in addition to the MSQ. Most missions are merely filler tasks that award experience points, but a select handful is worthwhile because of the unique rewards. One is a level 88 quest called Secret in the Box, which you can only access after doing the MSQ named Outside Help.

After completing this, proceed to Old Sharlayan and talk to the Mysterious Maiden NPC at X:10.6, Y:11. You’ll then have to engage with three distinct NPCs after following the mission marks. Finally, you must answer the riddle and engage with them in the ways we’ve described to advance and finish the mission.

If there are stages wherein you are out of options to get any prerequisite items, you can always visit the market board to buy the missing stuff using Gils. 

If you want to get some Gil, you can visit our website MMOPixel to buy FFXIV Gil. We will provide you with the best service and lowest price on the web.

Final Fantasy XIV: Endwalker - Secret In The Box Solution

Solution for the 1st riddle

As soon as you have examined the letter as instructed, proceed to x7.9, y13.8, and the Sleepy Student NPC. To complete this step, use the /doze command in the chat box. You’ll need to “doze” next to him.

Solution for the 2nd riddle

Go to x9.0, y7.3, and tell the squirrel Nutkin “golden acorn” to solve the second puzzle. In the chat box, use /s and then “golden acorn” to do that.

Solution for the 3rd riddle

The last puzzle directs you to x11.5, and y8.5, where speaking with Izumi is all required. Return to the Maiden, and you will receive:

Experience points between 169,000 and 190,000

735 Gil Chondrite Ring Coffer

The quest may be finished, and you can receive the Chondite Ring Coffer as a prize if you have figured out all three puzzles. When you open the Coffer, you’ll receive a level 88 and item level 545 ring appropriate for the job you’re using as compensation. That is all there is to know about FFXIV Endwalker’s Secret in the Box puzzles. 

Source: https://www.mmopixel.com/news/final-fantasy-xiv-endwalker-secret-in-the-box-guide.html